Archive for the ‘Uncategorized’ Category

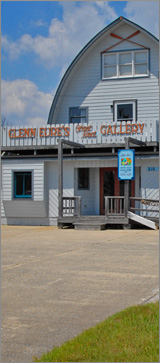
Printing a Large Woodcut

Finding wood for a print the size of THE OUTER BANKS: YESTERDAY AND TODAY is a challenge.  The block for this print has an inlay in the center, expanding the width but retaining the natural edges.  The image is created by carving out the negative space thus relieving raised surfaces for inking.  The printmaker uses medium and small brayers for this, careful not to deposit ink in recessed areas.

Masa paper (thin but tough) in laid over the inked block using one motion, and the rubbing process begins.  Glenn Eure uses his own “engineered” device for this process – a wooden spoon taped to a chair spindle weighted with metal rods.

Inking and rubbing this 3 x 7 ft. block takes about 3 hours.  Muscle and skill are required both for transferring the image to achieve consistency of ink density or gradations of tone if that is desired as well as to avoid dipping into recesses which could tear the paper    Here the rubbing is almost complete.  No time to cut through the paper!!

When the edition is complete, this block will be dowled into a frame for a large table.  A framed print depicting Outer Banks lighthouses and landmarks from Corolla to Ocracoke hangs on the wall behind the artist.

INKING THE COLLAGRAPH PLATE
& PULLING THE PRINT


Inking the collagraph plate intaglio

After “building” a plate on a surface such as matboard, the printmaker carefully inks that plate using a stiff tab of matboard.  Ink covers the surface and is pushed into the recesses.


Wiping the surface of the inked plate

Tarleton or stiffened cheesecloth is balled up with crumbled newsprint inside.  The surface of the plate is gently stroked using a controlled circular motion to avoid removing too much ink from the concave and convex layers.


Preparing the brayer for a relief rollover

A strip of a second ink color is applied on a glass surface and worked with a brayer using a forward and up movement until the distribution of ink on the brayer is uniform.   The inked brayer is then rolled over the plate to create a variety of color combinations.  The artist may adjust the color manually by wiping chosen areas or adding more ink with a small brayer.  This process can be repeated using rollers of varying durometers to reach different levels of the plate.


Pulling the print

The print paper, which has been soaked to remove sizing and then blotted, is placed on top the plate on the press bed and covered with blankets.  It is rolled through the press as the press wheel is manually turned.  The image from the inked plate is pressed onto the paper.


Finished print is removed and dried

Lifting the blankets to reveal the finished print is an exciting moment in a long process. The print is removed and hung or placed under glass to dry.  If the printmaker is pleased with the result, he can begin the inking process again for another print.  If the desired effect has not been achieved, he may use this state print as a guide for further work on the plate or to determine refinements he may want to make in the inking process.


Welcome to WordPress. This is your first post. Edit or delete it, then start blogging!